The client portal: getting started
The portal is the secure space where your clients receive their documents, sign, upload their files, write to you and pay their invoices. This article gets it running: your portal address, the one-time settings, your first client, then a tour of the headquarters. The screenshots come from the application, with fictional data (Cabinet Exemple, Société Exemple inc.).
Where the portal lives
In the left menu, click Client portal. You land on the portal headquarters: every client, every request, signature and conversation in one place, without opening their files one by one.
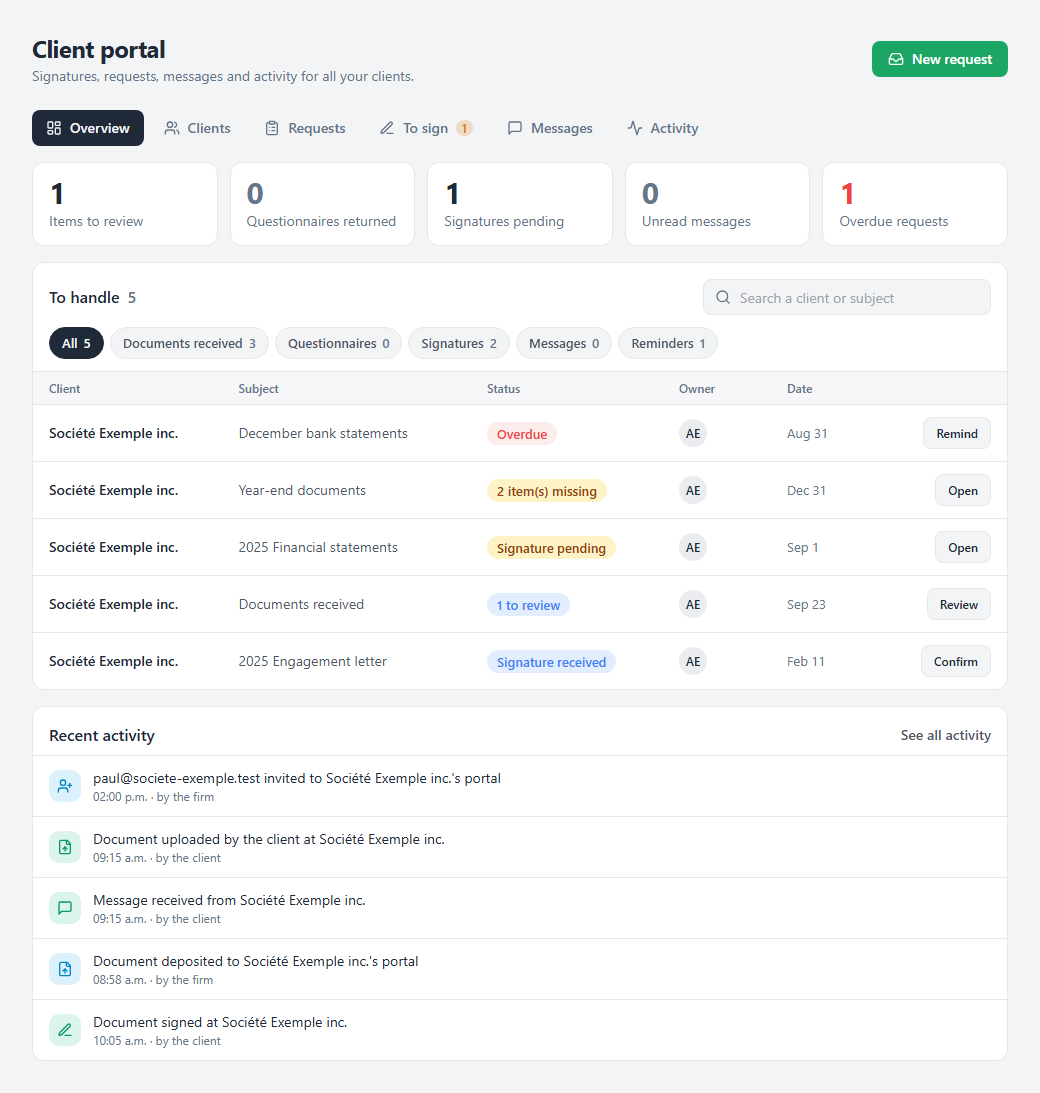
The headquarters Overview. Top right: New request.
The headquarters has six tabs: Overview, Clients, Requests, To sign, Messages and Activity. Every screen has its own address: a refresh (F5) leaves you exactly where you were, and you can copy the page address to send it to a colleague.
Every active member of your team sees all portal clients, their documents and their messages. File-by-file sharing only applies to financial-statement files: seeing a client's portal does not open their accounting file.
No Client portal entry in your menu? The portal is not included in your current plan: write to us from Support.
Getting started, step by step
Give your portal an address
From day one, your portal is online at a temporary address in your
name, for example https://yourfirm.ledgerapp.ca: nothing to set up. You
find it in Settings, Client portal tab,
Temporary address section, with a copy button. Invitations, sign-in
links and notices use it until your own domain is active. You can change its name: the
old address then forwards to the new one, and links already sent keep working.
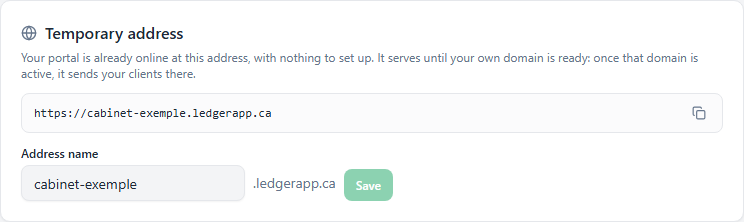
The address your portal gets out of the box.
The best setup is still to serve it under your own domain, for
example client.yourfirm.ca: your clients recognize an address they
already know, and it belongs to you.
- Open Settings, Client portal tab, Your own domain section.
- Type the full hostname (
client.yourfirm.ca) and click Add. - Ledger shows the record to create at your registrar (the company you bought your
domain from). Copy it field by field: Type CNAME,
Name (the part before your domain, here
client), Value30e86d64ff565b27.vercel-dns-017.com, and leave the TTL at its default. The copy buttons prevent typos. - Come back and click Verify. The status goes from Waiting for DNS to Active. Propagation can take a few hours: click again later if needed.
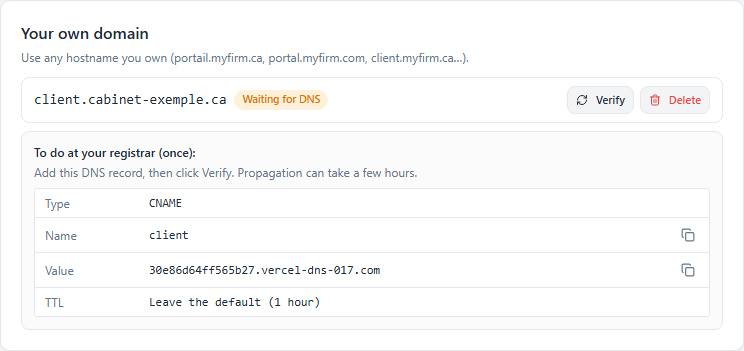
The record to create at your registrar, once.
Once the domain is active, everything follows: invitations, sign-in links and email notices point to your address, and a client who types it lands straight on their portal. The temporary address now forwards to your domain: links already sent keep working. Nothing else to configure.
Set up notices and reminders
Still in Settings › Client portal, the Email notices section is on by default: your clients are notified when you deposit or request a document, or when an invoice awaits them. Turn off pauses all of the firm's notices, Turn back on resumes them.
Scheduled reminders nudge the client who is late with a document, a questionnaire or a signature: Reminder every (counted from sending), Heads-up before the due date and Cap per request. Reminders go out every morning at 9 a.m. Eastern time.
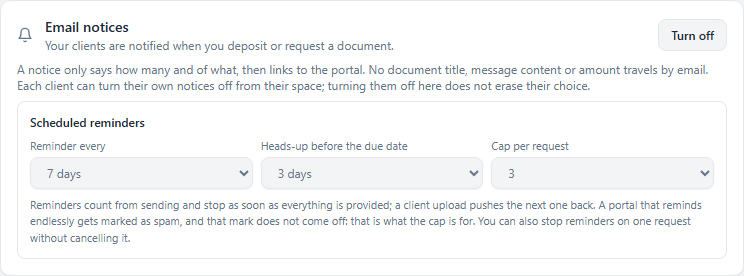
A notice only says how many and of what. No document title, message content or amount travels by email.
Each client can turn off their own notices from their space; turning them off here does not erase their choice.
Prepare your standard folders and templates
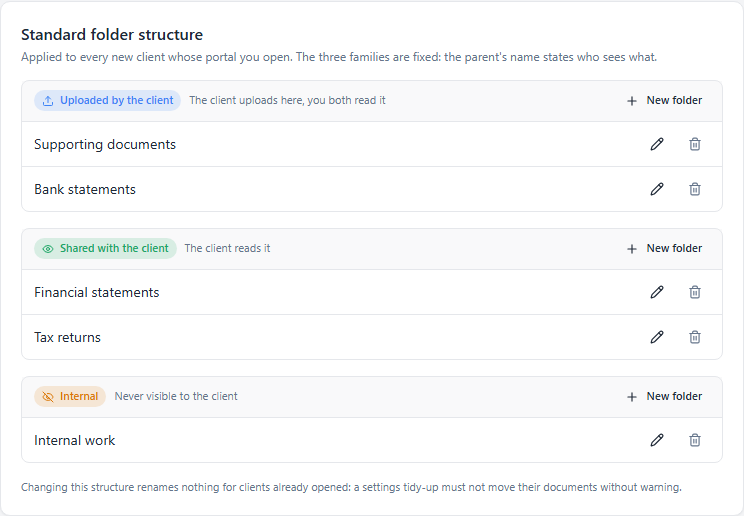
The Standard folder structure is applied to every new client whose portal you open. It comes in three fixed families, and the family decides who sees what:
| Uploaded by the client | The client uploads here, you both read it. |
|---|---|
| Shared with the client | The client reads it. |
| Internal | Never visible to the client. |
Add your folders to each family with New folder. Changing this structure renames nothing for clients already opened.
Request templates name once the documents you ask every client for (for example "Corporate year-end": bank statements, credit card statements, accounts receivable listing), each with its number of files and its due date in days.
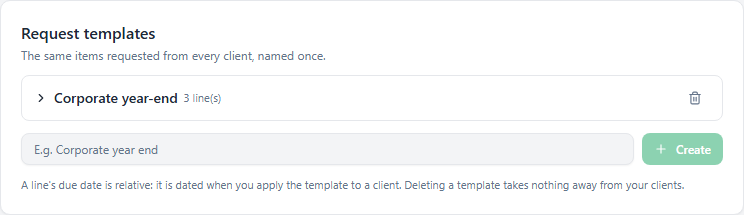
A line's due date is set when you apply the template to a client.
Open your first client on the portal
Clients tab of the headquarters: your Ledger clients are already there. The Active portal and No portal filters separate those who already have access from the others; a client opened only in the portal is marked Portal only. To open a client's portal, click their row, then invite their user (step 5).
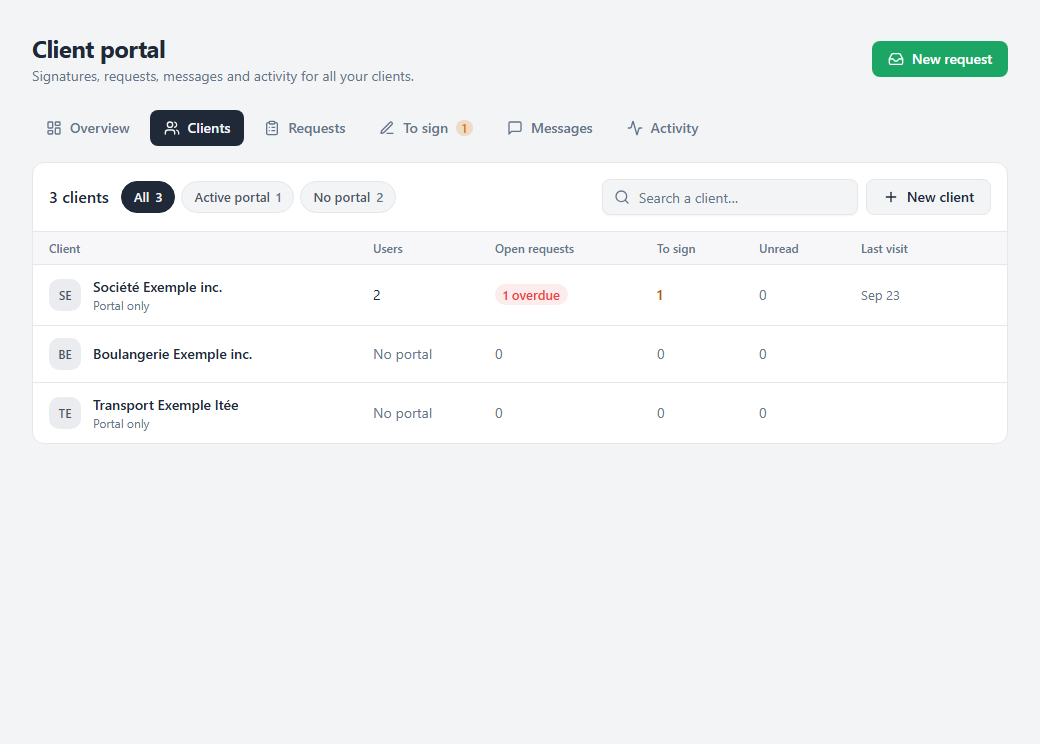
One row per client: users, open requests, documents to sign, unread messages and last visit.
For a client who does not exist in Ledger yet, click New client: Legal name, Client type, Email and Tags. The email doubles as the portal access: the Give portal access to this address box is checked, and Create and invite creates the client and sends their invitation in one go. Uncheck it to invite them later (the button goes back to Save).
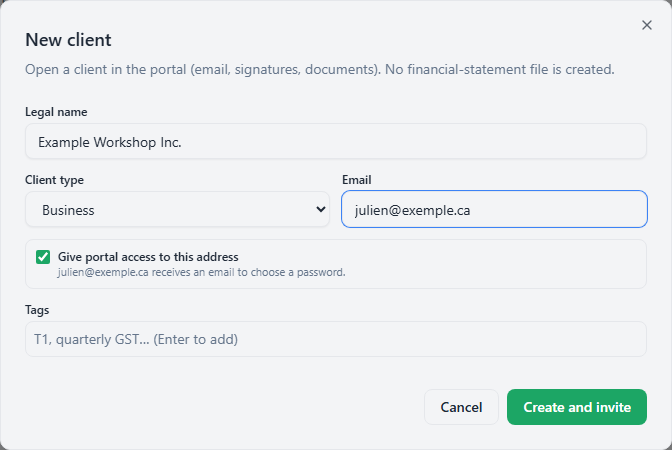
No financial-statement file is created. When you need one, the Open a financial-statement file button on their page moves them into the financial-statements world.
Invite your client's user
Open the client, Access section, then Invite. Fill in Email, Name and Role, and click Send the invitation. The email from the client's record is suggested as long as nobody has that access yet.
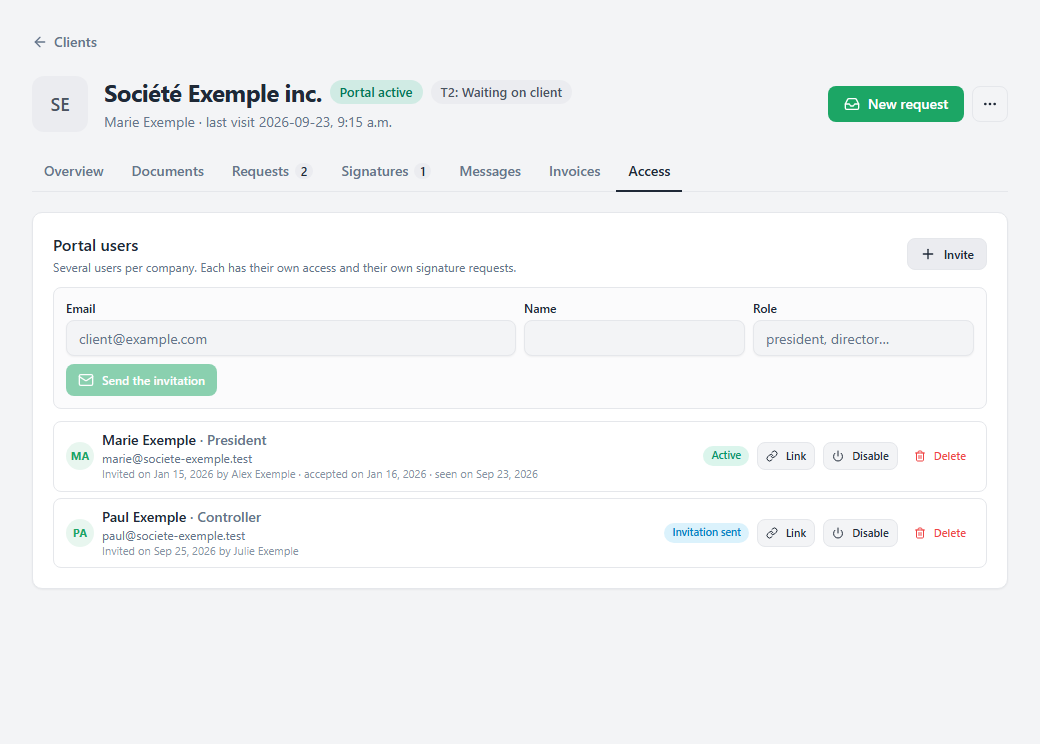
A company can have several users: each has their own access and their own signature requests. On each line:
- the status: Invitation sent, Active or Disabled;
- Link copies a sign-in link to forward yourself (handy if the invitation got lost or expired);
- Disable closes the access without erasing anything, Enable reopens it;
- Delete erases the access and its sign-in account, which frees up the email. Documents, messages, the activity log and already signed documents, with their proof, are kept; pending signature requests are cancelled.
The client receives an email in your firm's name, in their language (set by the Portal language on their page). The Choose my password button takes them to the welcome screen; the link works once and for a limited time.
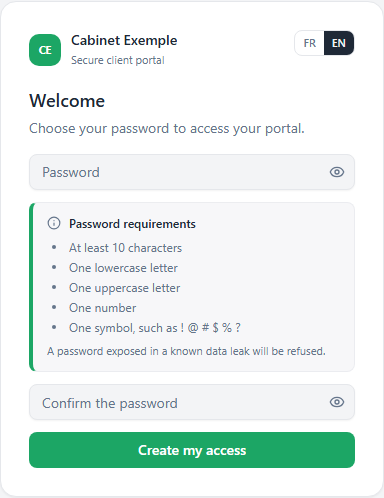
What your client sees when following the invitation.
A member of your firm's email cannot be used as a portal access: use your client's address.
The headquarters at a glance
Overview gathers what needs your attention: the counters (Items to review, Questionnaires returned, Signatures pending, Unread messages, Overdue requests) and the To handle queue. The queue filters (All, Documents received, Questionnaires, Signatures, Messages, Reminders) sort it, and each line takes you exactly where it points: Remind, Open, Review or Reply. The initials show who is responsible for the file.
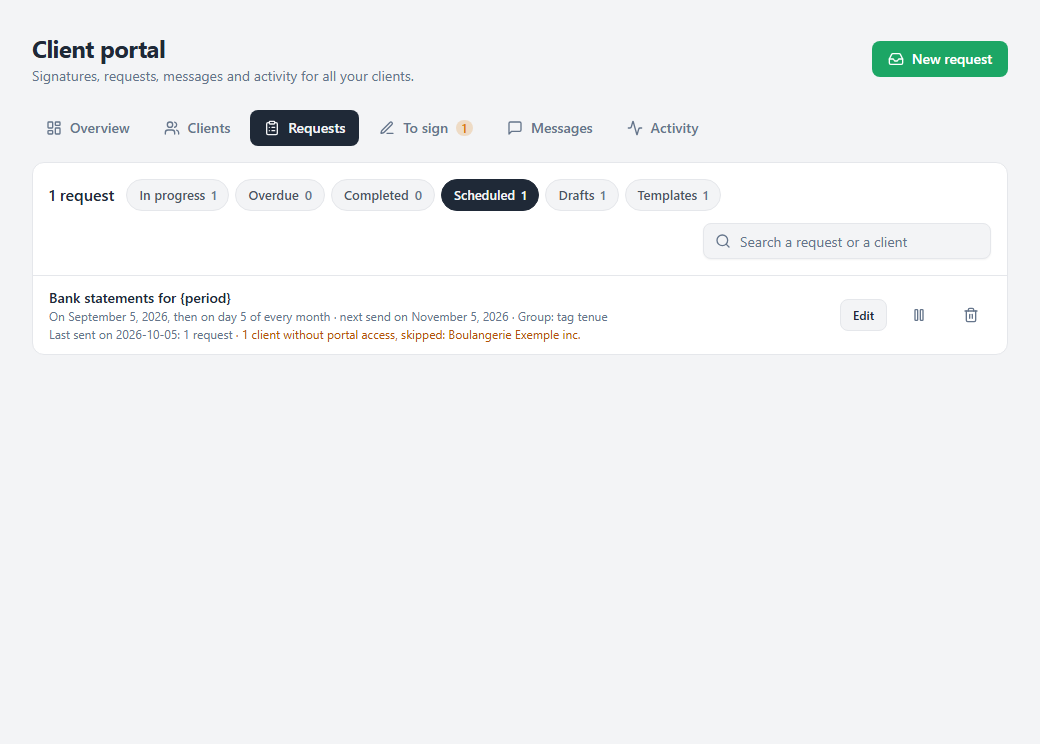
Requests lists every bundled request of the firm, with its client, its due date (in red once passed) and its progress ("3 of 5"). The In progress, Overdue, Completed, Scheduled, Drafts and Templates pills say how many there are of each, and the search covers the title and the client. A line opens the Requests section of the client's page; under Drafts, Resume reopens the editor on the draft, and under Templates, Use opens it filled from the template.
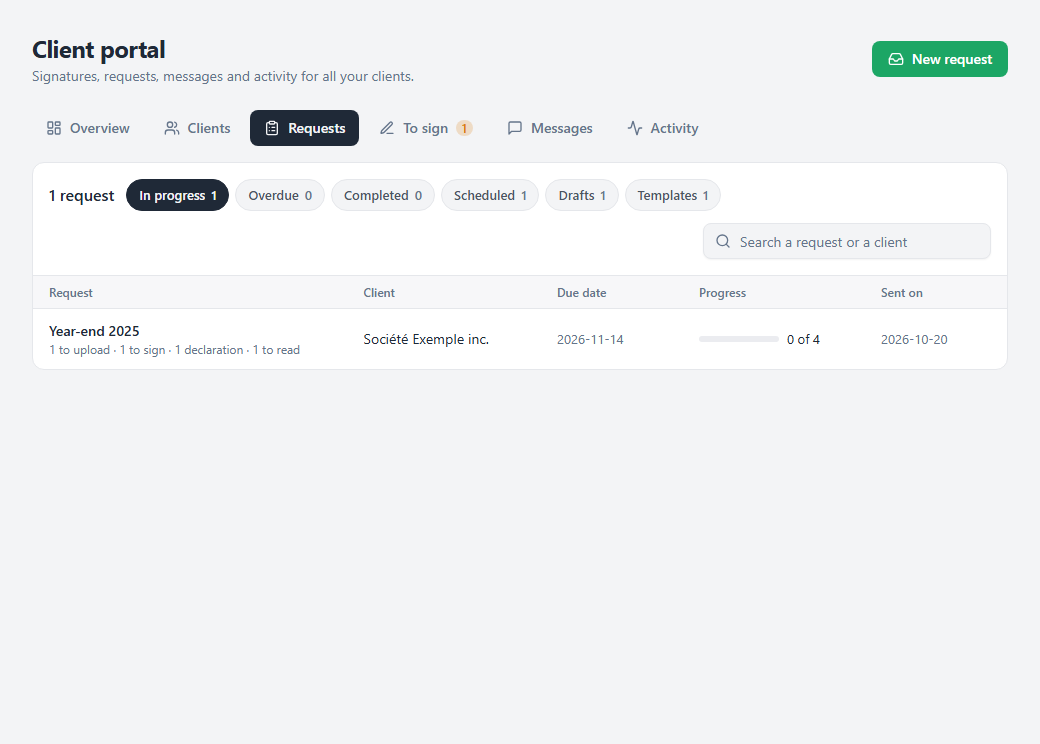
Under Scheduled, each scheduled request shows its frequency, its next date, whom it targets, and the result of its last run, with the clients skipped for lack of portal access.
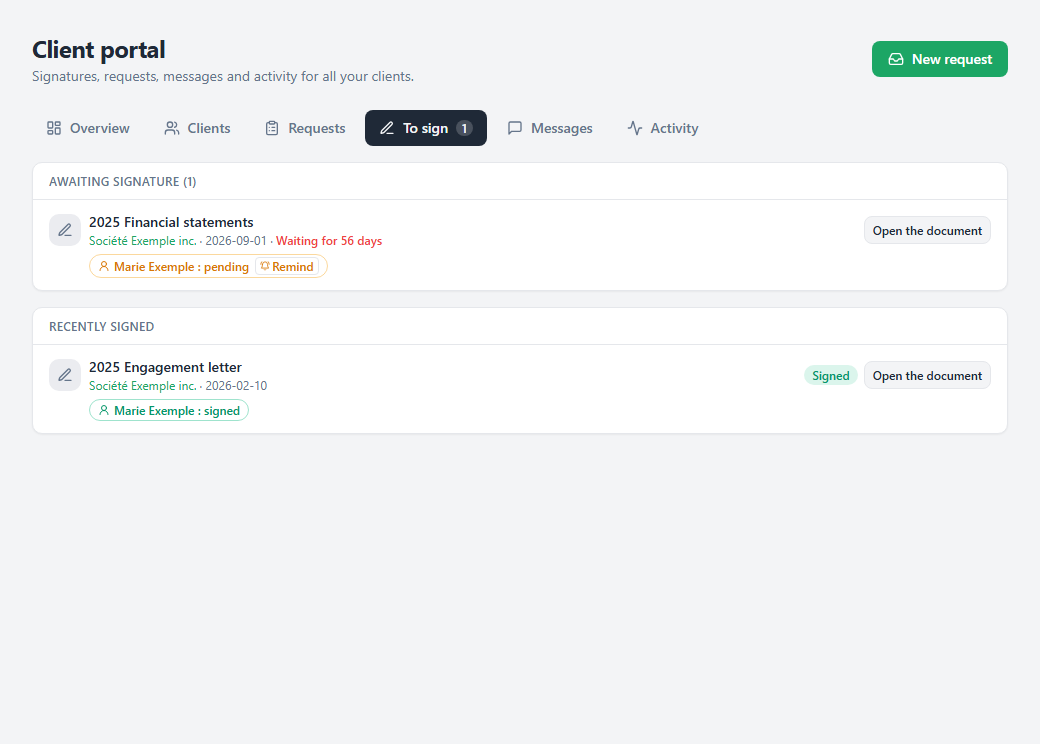
To sign lists the documents waiting for a signature, with how many days they have been waiting, then the recently signed ones.
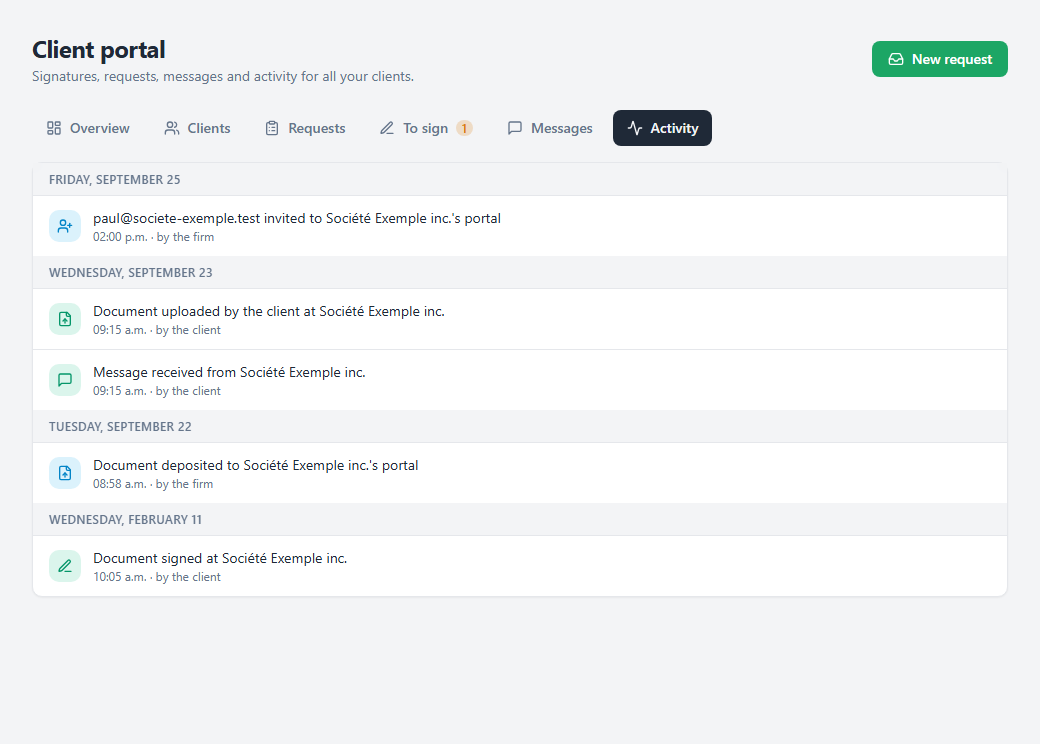
Activity traces everything that happens on the portal, day by day, telling apart what comes from the client and what comes from the firm.
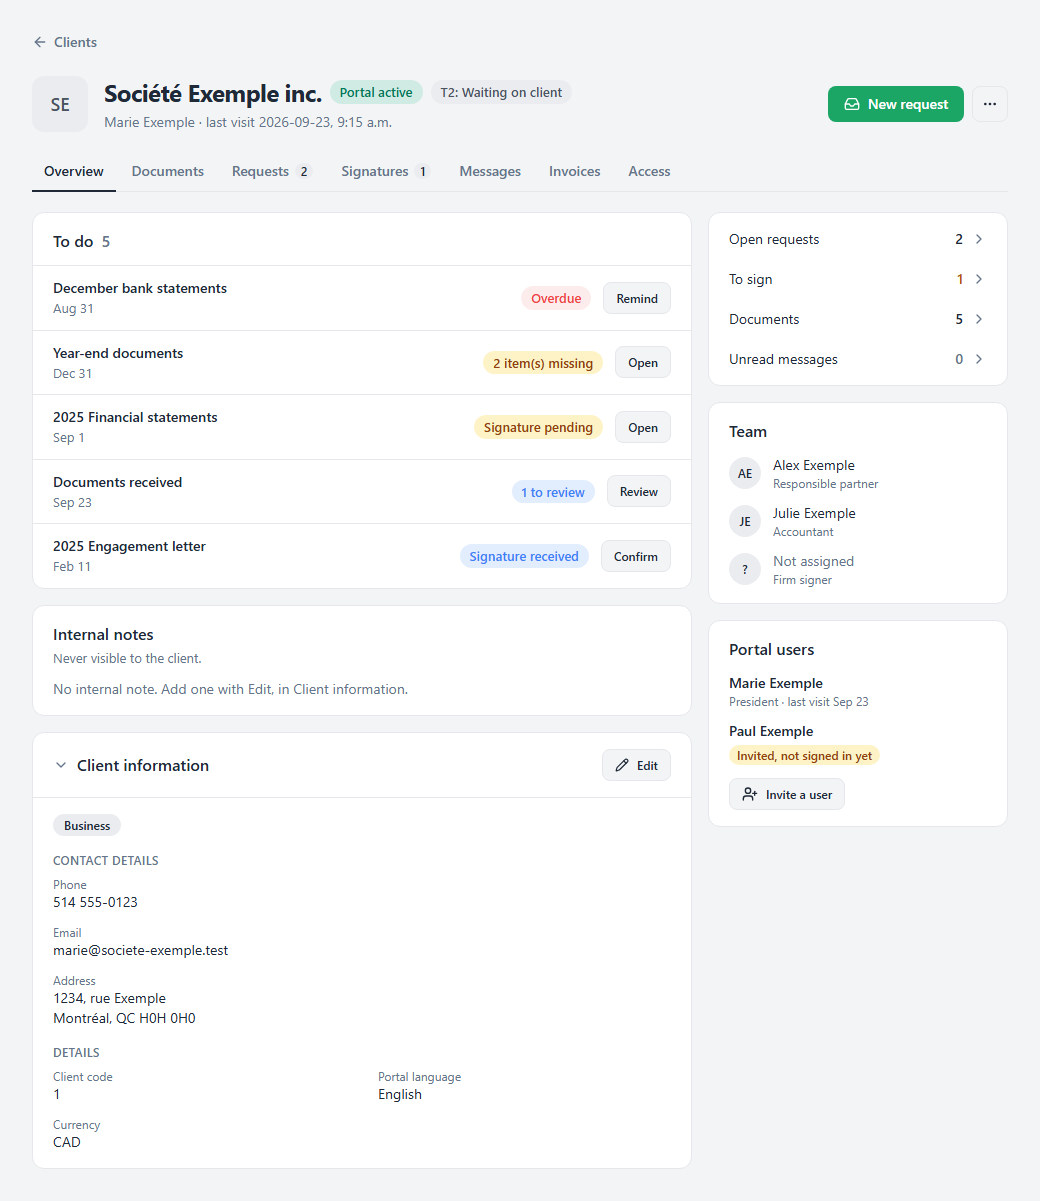
Clicking a client opens their portal page. Its header shows the client's name, the portal status, the stage each of their productions has reached in the pipeline (T2, GST…), the New request button and the ⋯ menu (See as the client, FS file, Invite a user). Seven sections follow: Overview, Documents, Requests (documents and questionnaires), Signatures, Messages, Invoices and Access. The overview shows what to do for this client, internal notes, their information, counters that lead to each section, the file team and the portal users.
See as the client
On the client's page, the ⋯ menu then See as the client shows your client's real screen, read-only. You stay signed in as yourself: no session is opened in their name, and nothing you touch reaches them. If the company has several users, pick one at the top right.
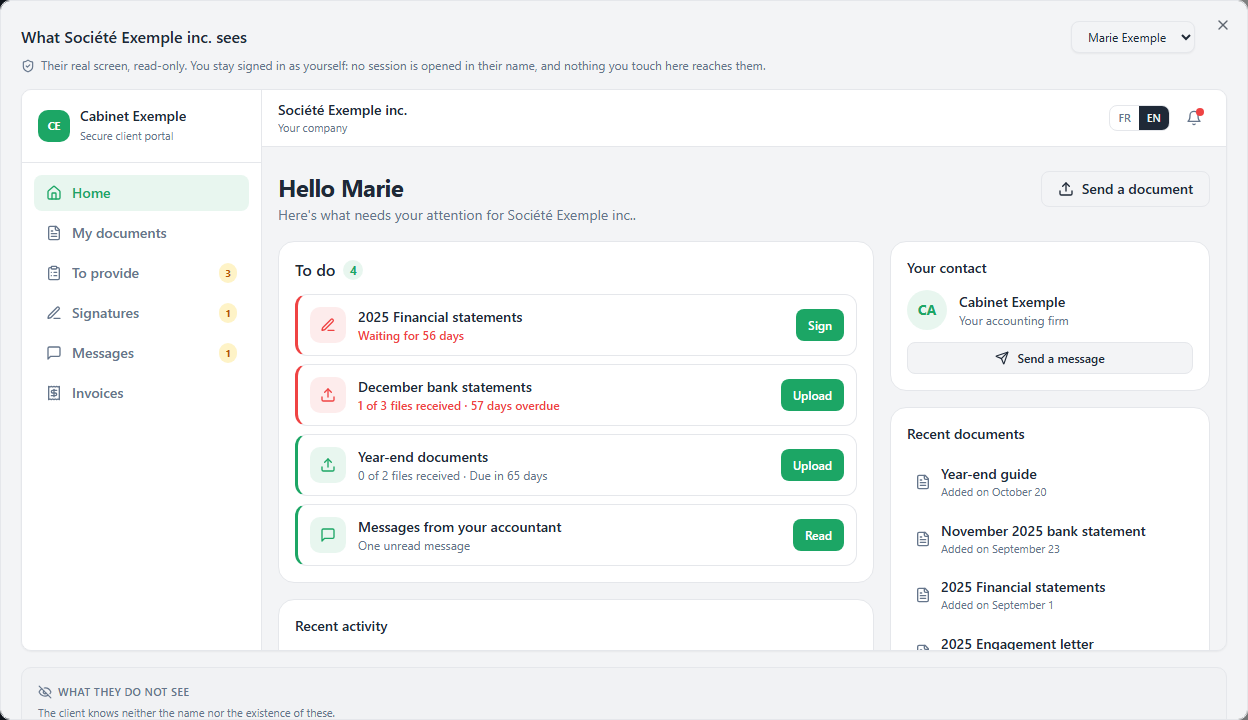
Below their screen, What they do not see: internal folders, documents in the trash or addressed to someone else.
Portal emails
- In your firm's name. Your client sees your name as the sender.
Emails go out from a no-reply sending address,
noreply@ledgerapp.ca: if a client receives nothing, have them check their junk mail and add this address to their approved senders. - Replies reach the right person. If your client replies to the email, the reply goes to the team member who took the action (deposited the document, placed the request, wrote the message, sent the signature reminder). Otherwise, to the file's accountant, then the responsible partner, then the email on your firm's profile.
- In the client's language. French or English, per the Portal language on their page.
- Nothing confidential. A notice says what is waiting and links to the portal; the content stays behind the sign-in.
- Quickly. Notices go out within minutes, and reminders at 9 a.m. Eastern time. A new invoice waits 10 minutes: if you email it yourself in the meantime, the portal notice is not sent, so the client is not told twice.
The desktop agent (Windows)
The desktop agent keeps your clients' documents in sync on your machine, in a Ledger drive that mirrors the portal's filing: one folder per client, then the families and their folders.
- In Settings, Security tab, Connected computers section, click Download the desktop agent, then install it.
- Launch the agent: it shows a code.
- In the same section, enter the code in Code shown by the agent and click Connect. A window shows the computer's name and when the code was requested: confirm only if that computer is in front of you. Never enter a code someone else gave you. Your password is never typed into the agent.
Each computer must be approved again every 90 days: the agent then shows a new code.
A file you drop into a client's folder goes up to the portal; a document deleted from the drive is deleted in Ledger (restoring it from the Windows recycle bin brings it back). A document uploaded by the agent does not notify the client. To disconnect a machine, use Remove in Connected computers: files already on the machine stay in place.